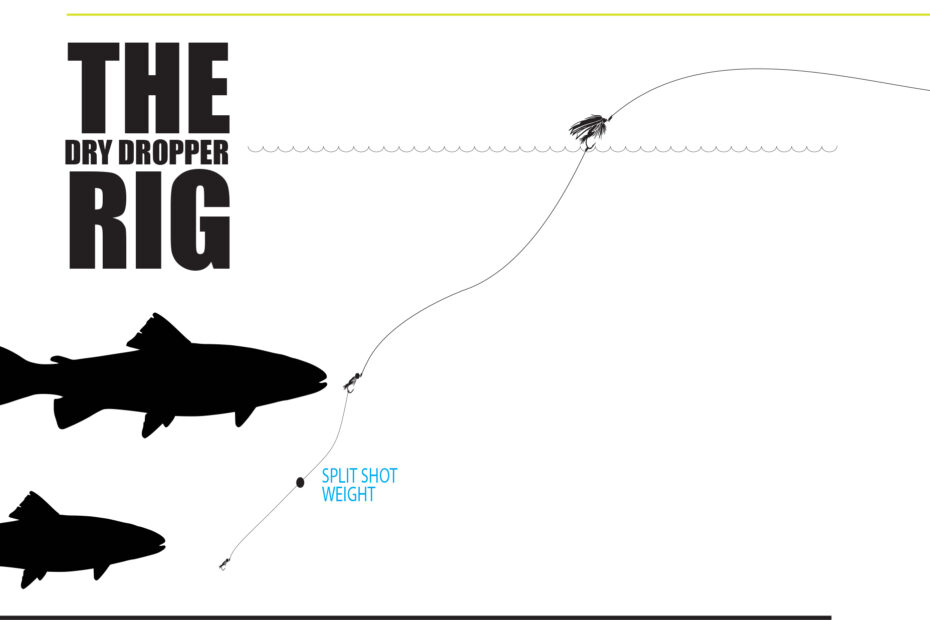
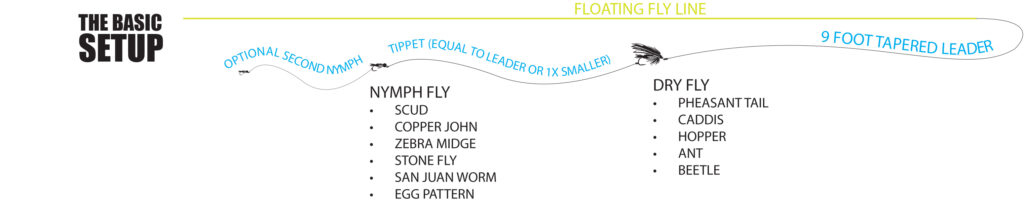
Fly fishing with a dry dropper rig is an effective way to target both surface-feeding and subsurface-feeding fish. The setup consists of a dry fly on the surface with a nymph or other subsurface fly tied to the leader below it. This combination allows you to cover a wider range of water and potentially catch more fish. In this article, we will go through the steps of setting up a dry dropper rig for fly fishing.
Step 1: Choose Your Dry Fly
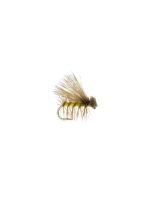
The first step in setting up a dry dropper rig is to choose your dry fly. This will be the fly that sits on the surface of the water and acts as an indicator for the subsurface fly. Choose a dry fly that imitates the insects that are present in the water you are fishing. This could be anything from a mayfly or caddisfly to a grasshopper or ant. You can also use attractor patterns such as a Royal Wulff or Stimulator.
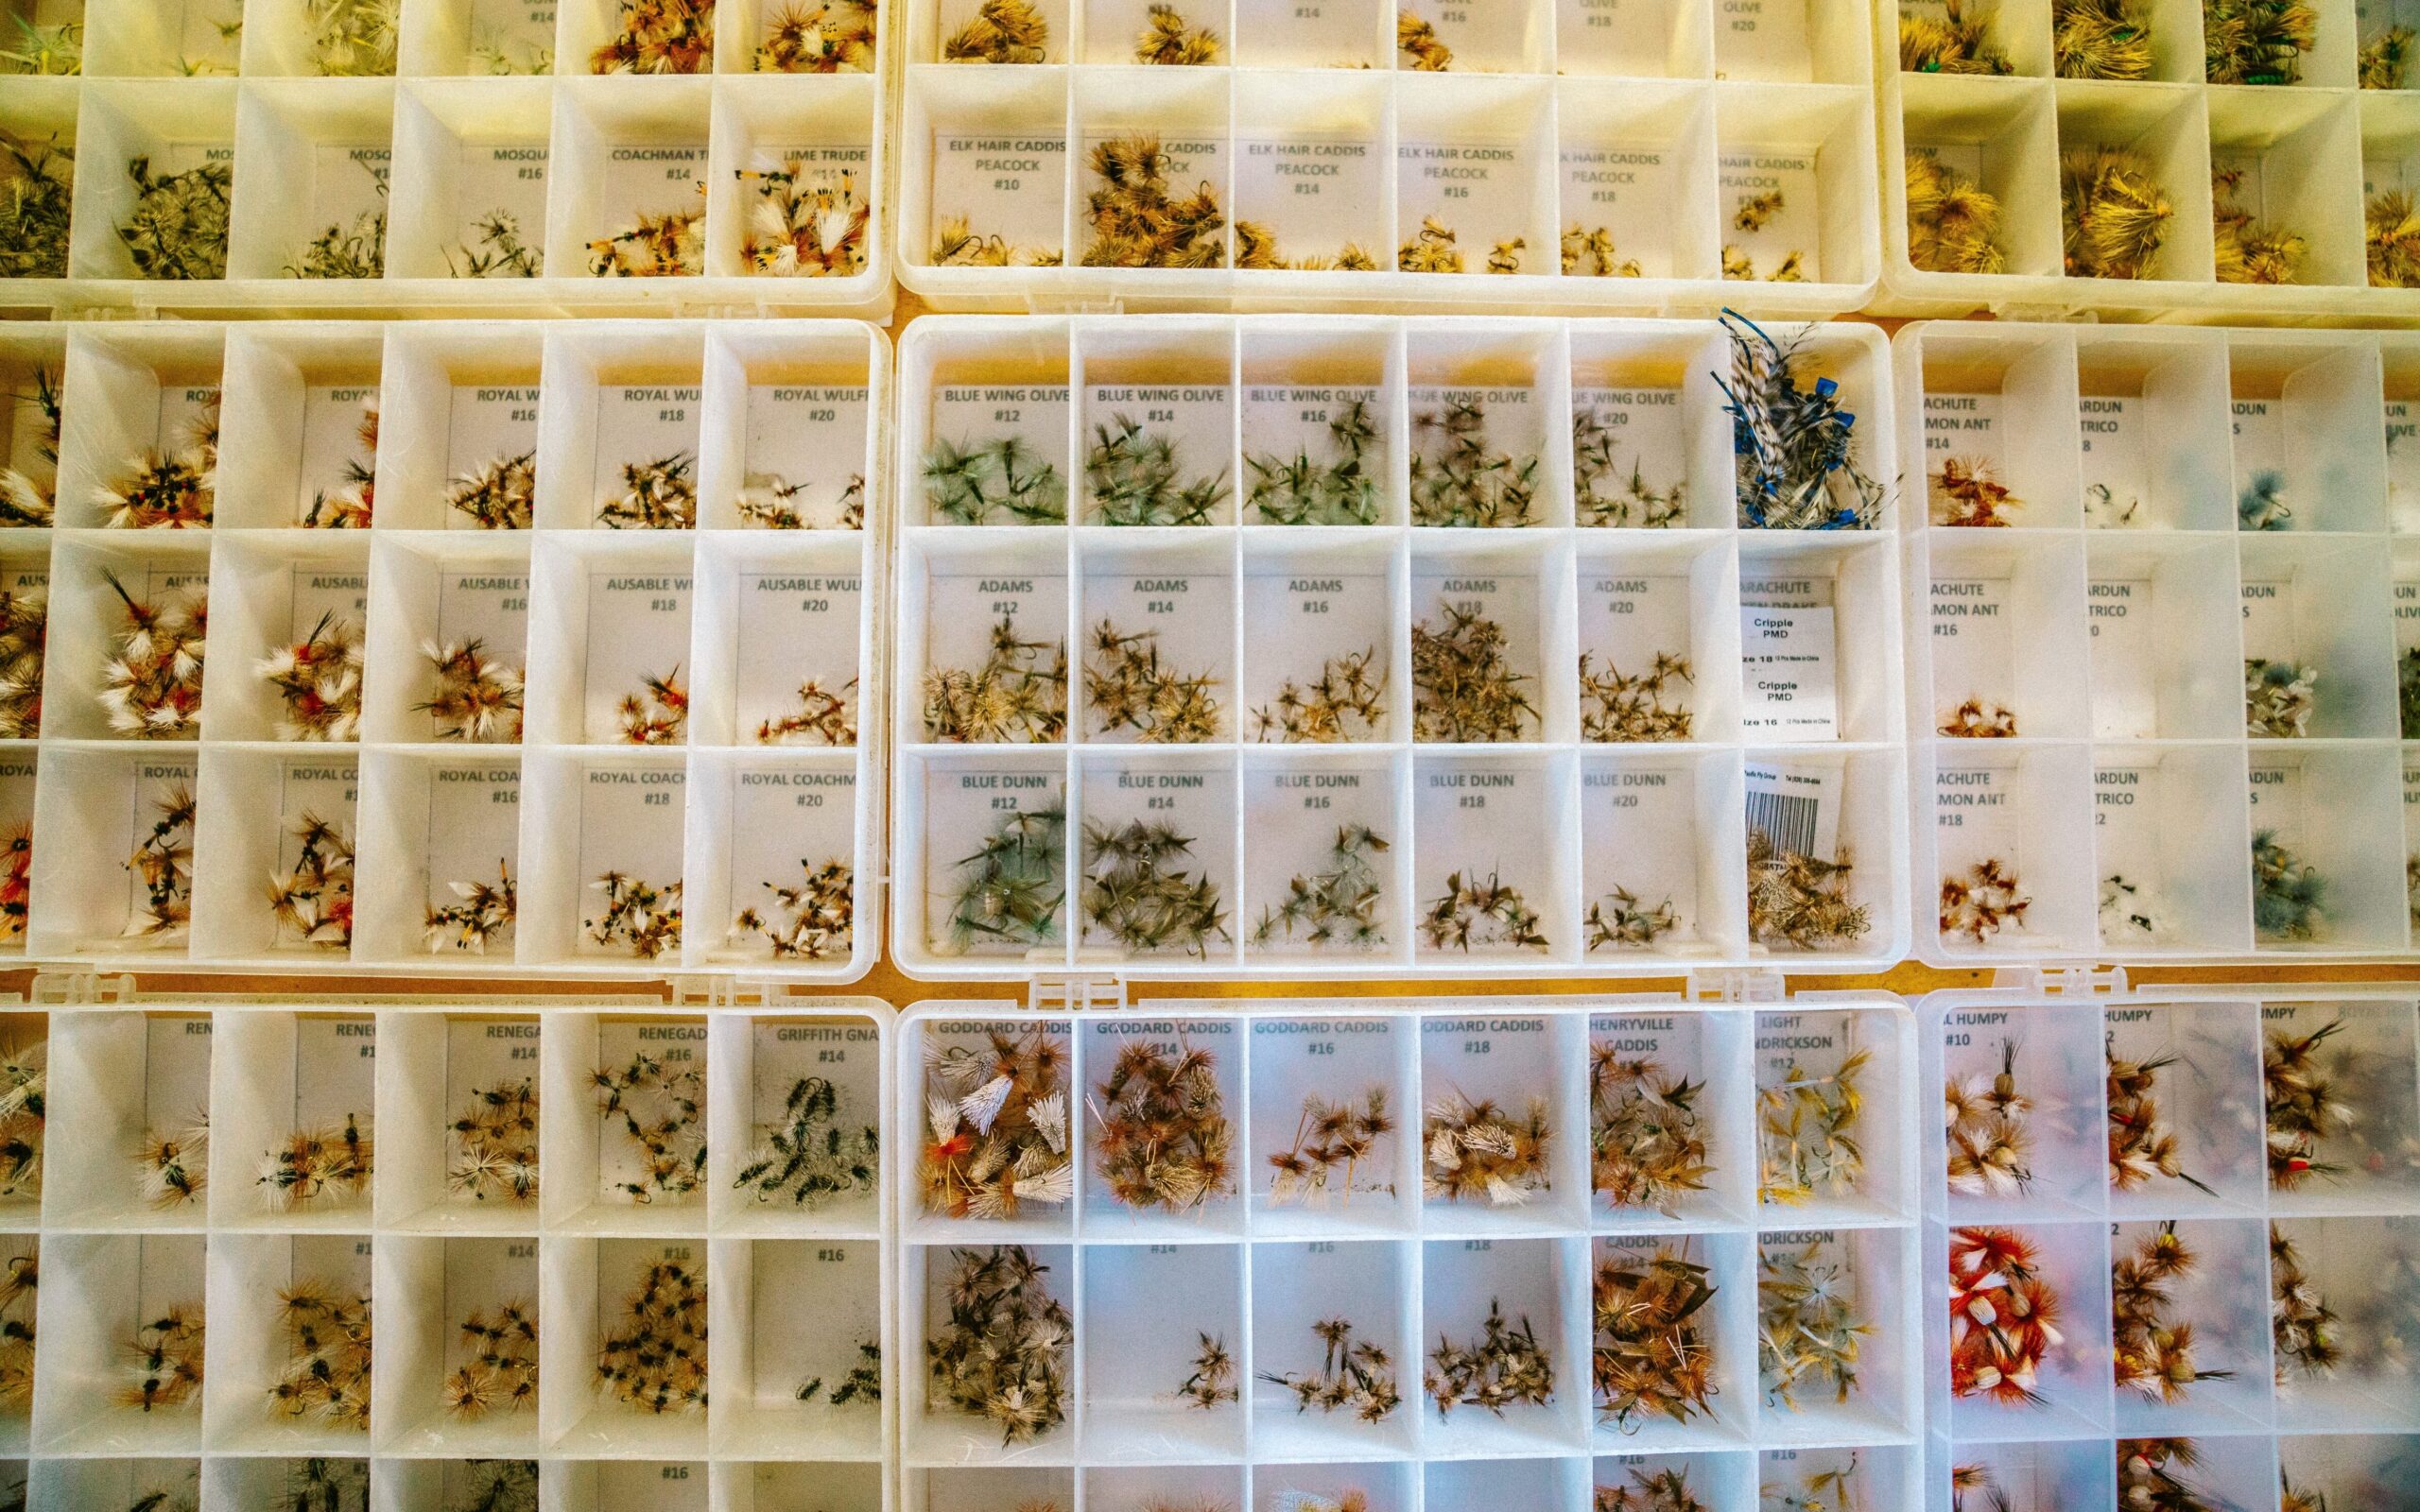
When it comes to selecting a dry fly for your dry dropper rig, there are a wide range of patterns that can be effective. Some popular options include:
- Parachute Adams – This classic pattern imitates a variety of mayflies and is a versatile choice for many different situations.
- Elk Hair Caddis – This pattern imitates caddisflies and can be fished both dry and wet.
- Stimulator – This attractor pattern can imitate a variety of insects and is a great option for fast-moving water.
- Royal Wulff – This attractor pattern is a great choice for both trout and bass and can imitate a variety of insects.
- Hopper Pattern – This pattern imitates grasshoppers and other large terrestrial insects and can be a great choice during the late summer and early fall.
When selecting a dry fly for your dry dropper rig, it’s important to consider the insects that are present in the water and choose a fly that closely matches their size and color. Additionally, it’s a good idea to carry a variety of different patterns in your fly box so that you can switch things up if one pattern isn’t working. With the right selection of dry flies, you’ll be able to effectively target both surface-feeding and subsurface-feeding fish and increase your chances of a successful day on the water.
Step 2: Tie On Your Dry Fly
Once you have chosen your dry fly, tie it onto the end of your leader using a clinch knot or other preferred knot. You can also use a dropper loop if you want to add a second nymph or another dry fly later on.
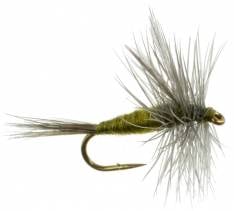
Step 3: Choose Your Subsurface Fly
Next, choose your subsurface fly. This can be a nymph, wet fly, streamer, or any other type of subsurface fly that imitates the insects or baitfish in the water you are fishing. It’s important to choose a fly that matches the size and color of the insects that are present in the water.

Step 4: Tie On Your Subsurface Fly
Once you have chosen your subsurface fly, tie it onto the leader using a dropper knot or tag end knot. This should be tied onto the leader below the dry fly, typically 12-24 inches away from the dry fly, but could be longer in deeper water.
When it comes to selecting a subsurface fly for your dry dropper rig, there are many options that can be effective. Some popular subsurface fly patterns include:
- Pheasant Tail Nymph – This classic pattern imitates a variety of aquatic insects and is a great all-around nymph.
- Hare’s Ear Nymph – This pattern imitates mayfly and stonefly nymphs and can be fished in a variety of water conditions.
- Prince Nymph – This pattern imitates stonefly and mayfly nymphs and has a lot of movement in the water.
- Zebra Midge – This small pattern is effective for imitating midge larvae and can be fished in slow-moving water.
- Woolly Bugger – This versatile pattern imitates a variety of baitfish and can be fished in both still and moving water.

When selecting a subsurface fly for your dry dropper rig, it’s important to consider the insects that are present in the water and choose a fly that closely matches their size and color. Additionally, it’s a good idea to carry a variety of different patterns in your fly box so that you can switch things up if one pattern isn’t working. With the right selection of subsurface flies, you’ll be able to effectively target both surface-feeding and subsurface-feeding fish and increase your chances of a successful day on the water.
When it comes to selecting the size of subsurface flies for your dry dropper rig, it depends on a few factors such as the species of fish you are targeting, the size of the insects in the water, and the type of water you are fishing in. Here are some general guidelines to help you choose the right size of subsurface flies:

- Size: 10-16 – These sizes are typically good for imitating larger insects such as stoneflies and mayflies.
- Size: 16-20 – These sizes are typically good for imitating smaller insects such as midges and small mayflies.
- Size: 20 and smaller – These sizes are typically good for imitating tiny insects such as midge larvae and small mayfly nymphs.
Keep in mind that these are general guidelines and you should also pay attention to the size of the insects that are present in the water you are fishing. It’s also important to match the size of the subsurface fly with the size of the hook on your dry fly. A good rule of thumb is to use a subsurface fly that is one size smaller than the dry fly hook. By matching the size of your subsurface fly with the conditions of the water and the species of fish you are targeting, you’ll increase your chances of success on the water.
Step 5: Adjust Your Leader Length
The length of your leader will depend on the depth of the water you are fishing and the length of your dropper. In general, a leader length of 9-12 feet is recommended for most fishing situations. You can adjust the length of your leader based on the depth of the water you are fishing and the size of the fish you are targeting.
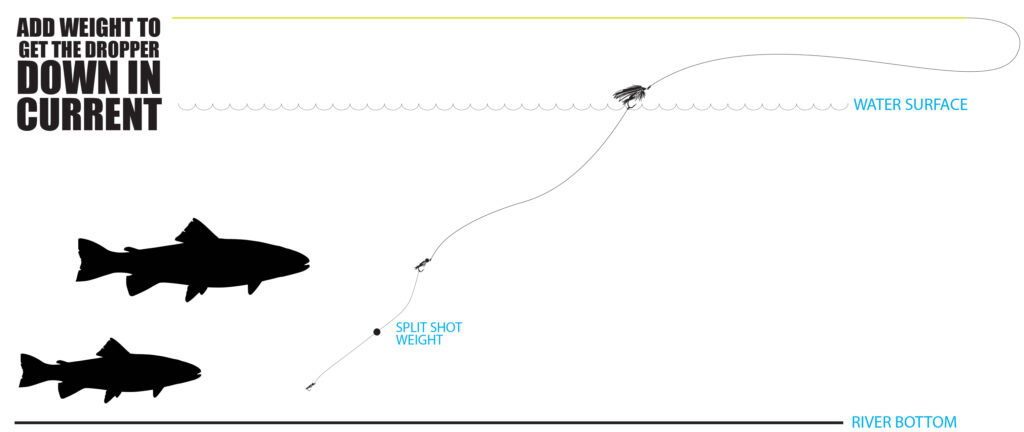
Step 6: Add Split Shot (Optional)
If you are fishing in deeper water or fast-moving currents, you may need to add split shot to your leader to help your subsurface fly sink. You can add split shot above or below the dropper knot, depending on your preference.
Step 7: Cast Your Dry Dropper Rig
Once you have set up your dry dropper rig, you can cast it out onto the water. The dry fly will float on the surface while the subsurface fly will sink below it. This allows you to cover both the surface and subsurface of the water column, increasing your chances of catching fish.
In conclusion, setting up a dry dropper rig for fly fishing is a great way to target both surface-feeding and subsurface-feeding fish. By following these steps, you can create an effective rig that will help you catch more fish on your next fly fishing trip. Remember to choose the right flies for the water you are fishing, adjust your leader length based on the depth of the water, and add split shot if necessary. With a little practice, you’ll be catching fish on a dry dropper rig in no time